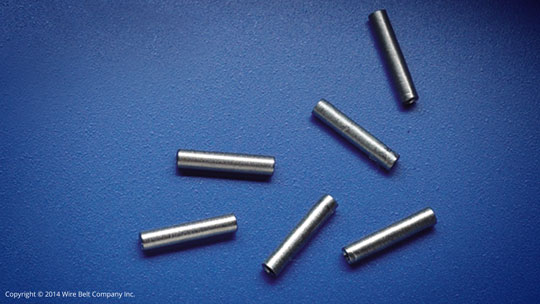
joining Tubes
Joining tubes can be used to create a hybrid join between a full strand weave and the use of joining clips. A single strand is cut into smaller single space sections, which are woven into the belt and joined together by crimping a stainless steel joining tube onto the adjacent wire sections. This method maintains the belt strength of a full strand weave whilst eliminating the distortion that occurs during the weaving process. It is important to consider whether joining tubes could mark product or have hygiene implications when choosing this method.
Installing joining clips
Joining clips come in two varieties: 1-space and 3-space clips. The 3-space clip is obviously stronger because its center space is woven into the belt as in the full strand joining method. These two types of clips should be used together, whenever possible to create a stronger splice and to help minimize the spacing gaps in the belt. (For example, a 7-space belt could be spliced using two 3-space clips... where as, a 9-space belt would use 1 single and two 3-space clips. See drawings below.) Refer to the chart on the reverse side for how many clips you should use for your belt.
IMPORTANT NOTE:
Two different end loops from adjacent clips cannot be attached to the same Z-bend. Only one joining clip end loop per Z-bend is allowed.
IMPORTANT NOTE:
There will be a full space gap between joining clips, please ensure product will not get trapped or fall through this gap.
IMPORTANT NOTE:
If a belt has damage in more than one place on account of fatigue, do not try to repair it. Install a new belt. Also, never save old belts to use for repairs because they have already been weakened from use. Purchase several extra feet of new belt to use exclusively for repairs.
| How Many Clips? | ||
| Number of Belt Spaces | Single Clips | Single + 3-Space Clips |
| 3 | 2 | 0 + 1 |
| 5 | 3 | 1 + 1 |
| 7 | 4 | 0 + 2 |
| 9 | 5 | 1 + 2 |
| 11 | 6 | 0 + 3 |
| 13 | 7 | 1 + 3 |
| 15 | 8 | 0 + 4 |
| 17 | 9 | 1 + 4 |
| 19 | 10 | 0 + 5 |
| 21 | 11 | 1 + 5 |
| 23 | 12 | 0 + 6 |
| 25 | 13 | 1 + 6 |
| 27 | 14 | 0 + 7 |
| 29 | 15 | 1 + 7 |
| 31 | 16 | 0 + 8 |
| 33 | 17 | 1 + 8 |
| 35 | 18 | 0 + 9 |
| 37 | 19 | 1 + 9 |
| 39 | 20 | 0 + 10 |


-
Before you begin joining:
- Plan out the number, type and placement of joining clips by laying them out in position across the belt
- Make certain that no two end loops on the clip hook around the same Z-bend and that all end loops point away from the direction of belt travel
-
Begin installation with the center space:
- Insert the appropriate type of joining clip into the center space on the edge of the belt
- If installing a single clip, use needle nose pliers to grip the splice clip, and hook the two ends around the Z-bends on either side of the center space
- -OR- If using a 3-space clip:
- Bend the clip in the center and insert the ends into the two spaces next to the center space
- Then insert the ends into the center space of the opposite edge and pull through until the center “locks” into place
- Use the needle nose pliers to grip the end loop, bend the wire up and hook it around the Z-bend on the opposite edge of the belt. Repeat for other end loop.
- Straighten the wire with pliers
-
Install the next joining clip on an outside edge if a single clip is used:
- Remove the ties holding the edges together
- Insert the joining clip through the near edge
- Connect the edge loop to the joining clip
- Grip the joining clip with your pliers and hook the end around the adjacent edge loop and the first Z-bend on the far edge
- -OR- If a 3-space clip is used:
- Remove the ties holding the edges together
- Bend and insert the joining clip around the second space in from the belt edge, then insert the ends into the opposite edge of the belt. Pull through until center locks in place
- Using pliers, connect the outside edge loop to the joining clip. Then grip the end of the clip and hook it around the adjacent edge loop. Hook the opposite end to its adjacent Z-bend
- Straighten wire with pliers or Wire Belt’s wire straightening tool
-
Install joining clip on the opposite edge:
- Install the same type of joining clip on the opposite edge in the same way
-
Install the remaining joining clips:
- Install the remaining joining clips, as appropriate, across the belt. There should be the exact same number and type of joining clips on either side of the center clip (the first clip you installed)
-
Re-tighten the tension